 Firefly
 Discover my latest projects and experiments.
655 words
3 minutes
WSL2环境配置

引言
WSL2是Windows系统上的Linux子系统的一个新版本,它可以让用户在Windows上运行Linux环境和应用程序,而不需要安装虚拟机或双系统。WSL2使用虚拟化技术在轻量级虚拟机中运行Linux内核,提供了更好的文件系统性能和更完全的系统调用兼容性。WSL2还支持运行图形应用程序和GPU加速等功能。WSL2可以实现文件、指令和网络的互通,方便用户在Windows和Linux之间切换和操作。WSL2是一个非常强大和灵活的工具,可以让用户享受Linux的优势,同时保留了Windows的体验。
启用Hyper-V和适用于Linux的Windows子系统
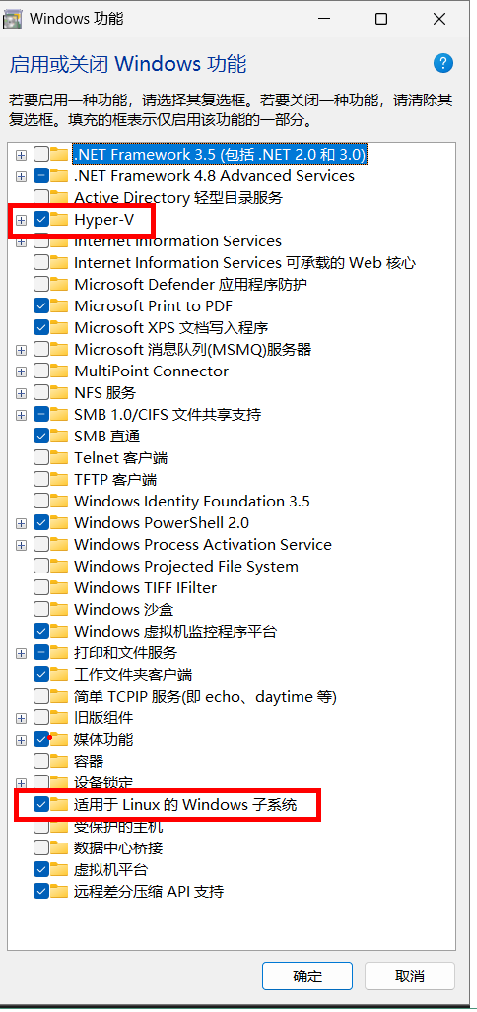
重启电脑
- 打开配置后,会在开始菜单新增一个Ubuntu的图标,单击之后会进入安装环节
- 如果没有Ubuntu的图标就再power shell中执行命令
wsl --install
【开始菜单】点击Ubuntu图标
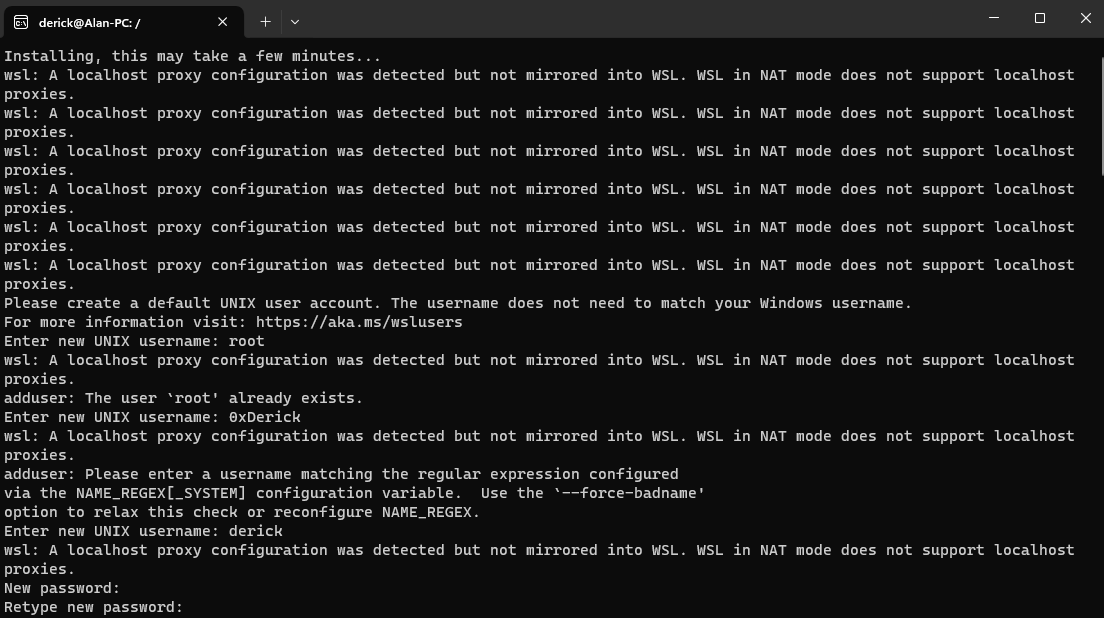
设置登陆账户密码
安装结束后会提示创建账户。已经有了默认的root账户,需要重新配置一个其他账户
wsl -l -o查看可以安装哪些Linux发行版
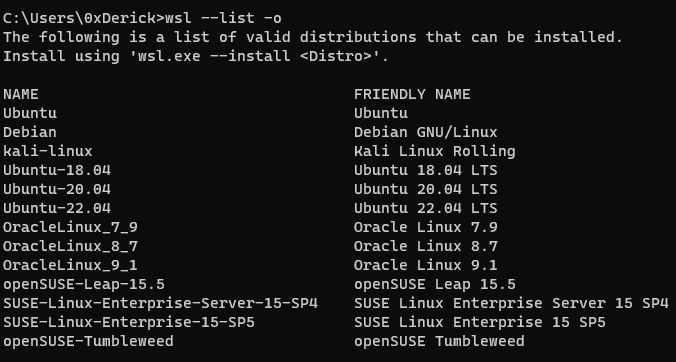
- 默认安装Ubuntu发行版,目前时Ubuntu2204
- 若要更改安装的发行版,请输入:
wsl --install -d <Distribution Name>。 将<Distribution Name>替换为要安装的发行版的名称。
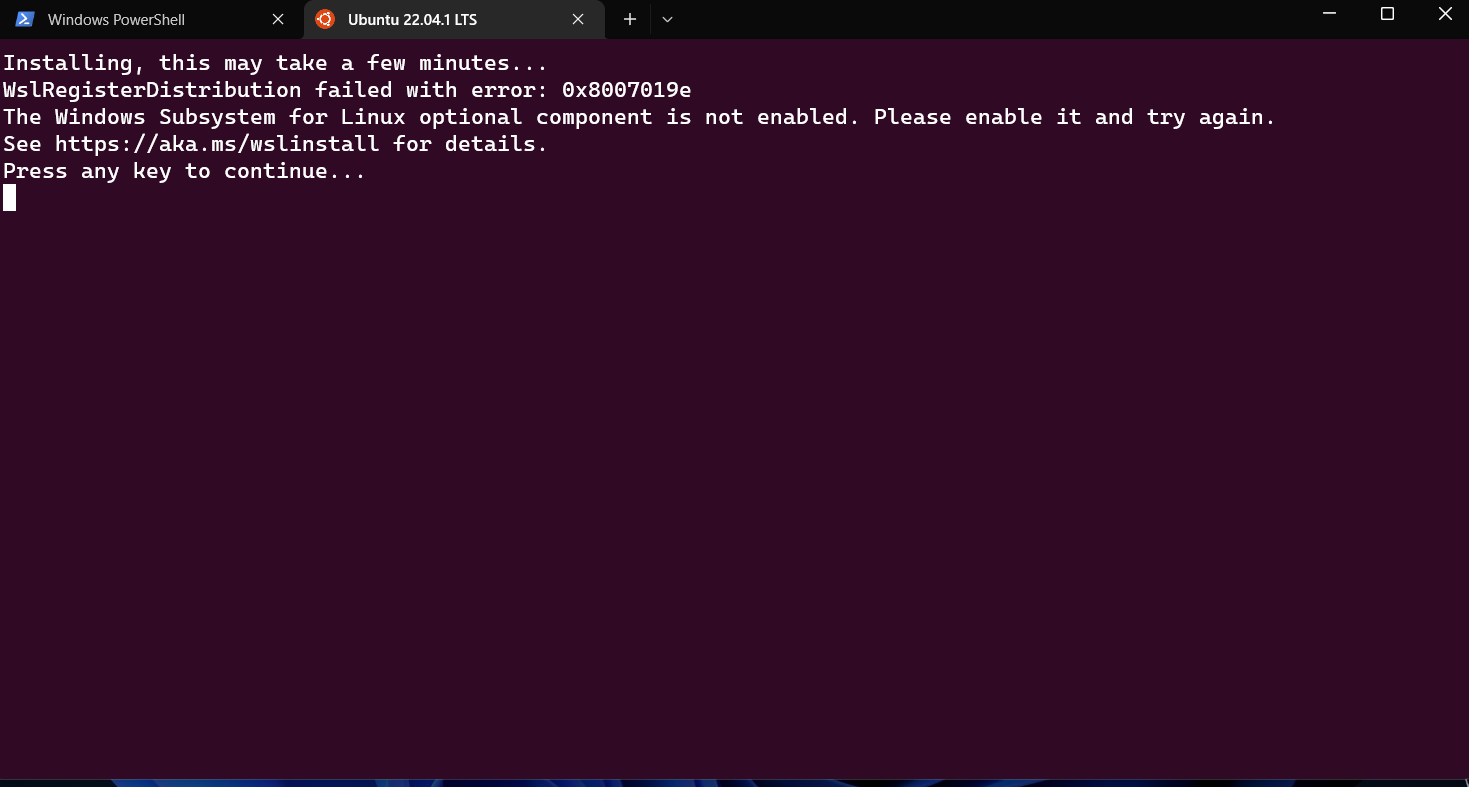
Q: 如果安装wsl2时出现error code is 0x8007019e
重新检查是否开启hyper-V和Linux 在Windows的子系统,然后执行如下命令,重装默认系统
wsl —install dism.exe /online /enable-feature /featurename
/all /norestart dism.exe /online /enable-feature /featurename /all /norestart wsl —set-default-version 2
自定义配置
# Settings apply across all Linux distros running on WSL 2[wsl2]networkingMode=mirroreddhcp=truednsTunneling=true
# Limits VM memory to use no more than 4 GB, this can be set as whole numbers using GB or MBmemory=4GB
# Sets the VM to use two virtual processorsprocessors=4
# Specify a custom Linux kernel to use with your installed distros. The default kernel used can be found at https://github.com/microsoft/WSL2-Linux-Kernel#kernel=D:\\Drivers\\WSL\\mykernel
# Sets additional kernel parameters, in this case enabling older Linux base images such as Centos 6#kernelCommandLine = vsyscall=emulate
# Sets amount of swap storage space to 8GB, default is 25% of available RAMswap=4GB
# Sets swapfile path location, default is %USERPROFILE%\AppData\Local\Temp\swap.vhdxswapfile=D:\\Drivers\\WSL\\wsl-swap.vhdx
# Disable page reporting so WSL retains all allocated memory claimed from Windows and releases none back when free#pageReporting=false
# Turn on default connection to bind WSL 2 localhost to Windows localhost#localhostforwarding=true
# Disables nested virtualization#nestedVirtualization=false
# Turns on output console showing contents of dmesg when opening a WSL 2 distro for debugging#debugConsole=true
# Enable experimental features[experimental]autoProxy=truebestEffortDnsParsing=trueuseWindowsDnsCache=false# autoMemoryReclaim=gradual# networkingMode=mirrored# dnsTunneling=true# #firewall=false# autoProxy=true# sparseVhd=true设置WSL最佳实践
Share
If this article helped you, please share it with others!
Last updated on 2023-11-01,880 days ago
Some content may be outdated